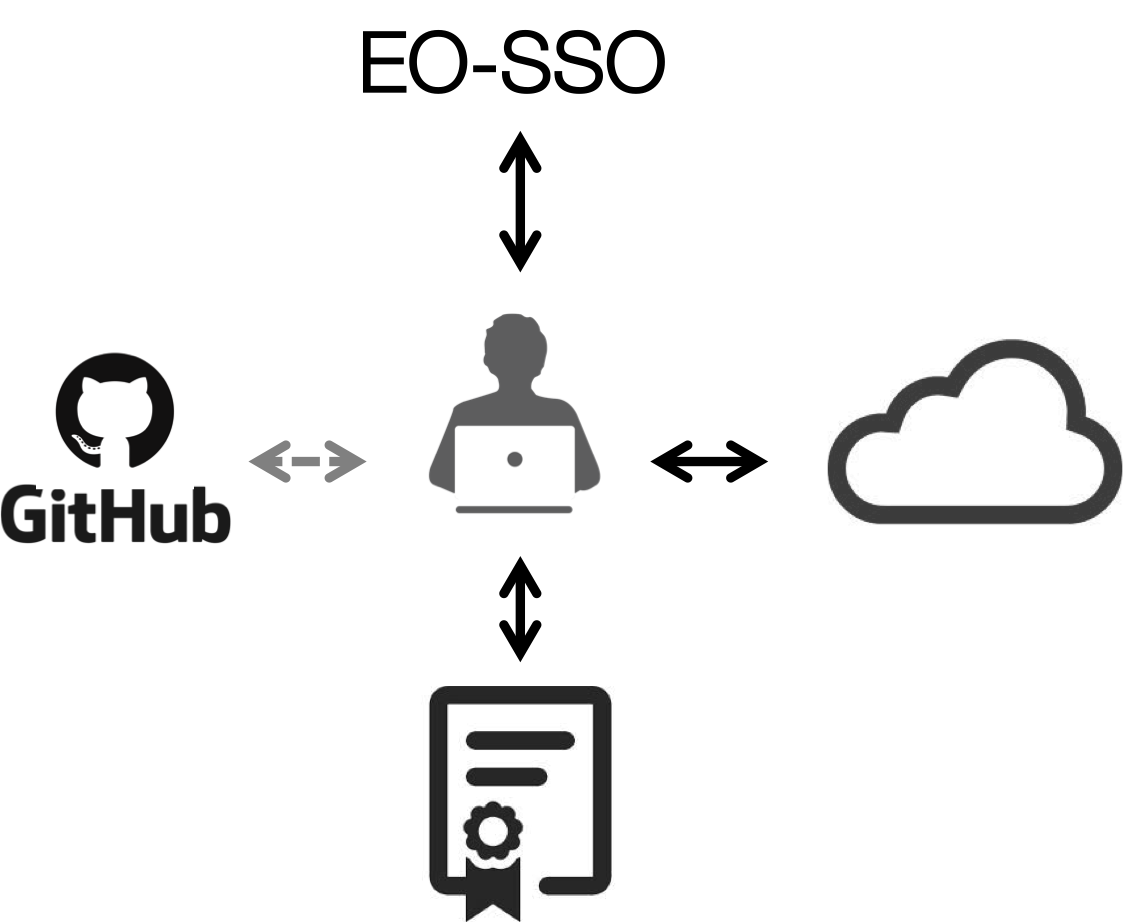
Find out how to sign-in using EO-SSO, access your Cloud resources or even link your profile with your Github account.

Figure 1: The Geohazards TEP portal
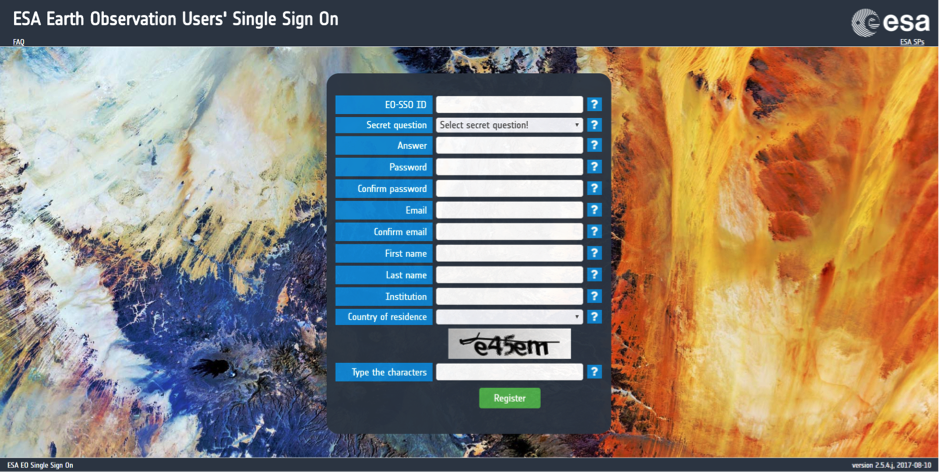
Figure 2: The ESA EO Users’ Single Sign On Registration Page
Note
Password must contain at least 8 characters, with at least one upper case lettre, one lower case letter, one integer and a special character (!, @, ?, ...).

Figure 3: Confirmation of Registration at ESA EO Users Single Sign On
4. Open your email and click on the link provided by the EO-SSO administrator team. You will be directed to a page confirming the activation of your account, as indicated by Figure 5.
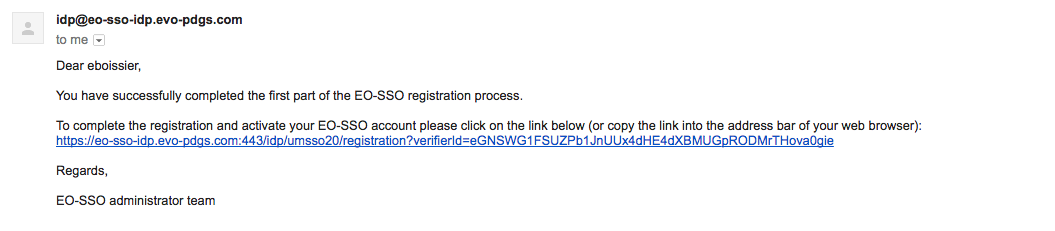
Figure 4: Email sent by the EO-SSO administrator team

Figure 5: Confirmation of Account Activation
Once registered on ESA EO Single Sign On (EO-SSO), you can simply sign-in using your EO-SSO credentials (username and password), and you will be automatically signed-in and redirected to the Geohazards TEP portal. At the first access, you may be asked to check your inbox in order to confirm your email address (cf. message banner “Pending activation!”).

If you never received the confirmation email, you can ask the system to send it again by clicking on the link send again the confirmation email:

After clicked the link received by email, you’ll be able to see your profile page of the portal:


By clicking on your username, you will access your profile page. The other icons give the following functionalities:
 Your current accounting balance (if greater than 0)
 Access to administration settings (for users with special privileges)
 Link to contact the Geohazards Tep support team
 Link to the Geohazards Tep documentation
 Log out from the portal
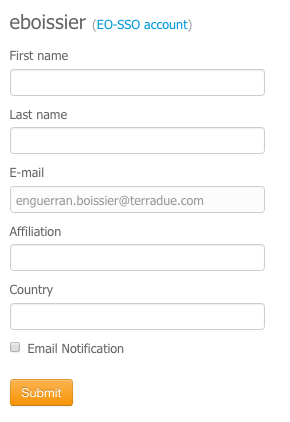
Fill in your profile:
Note
Direct access to your EO-SSO account is provided by clicking on EO-SSO account.
To change your EO-SSO password:
Note
If your EO-SSO email is different from the one recorded in your profile, a message will appear in your profile (see image below).

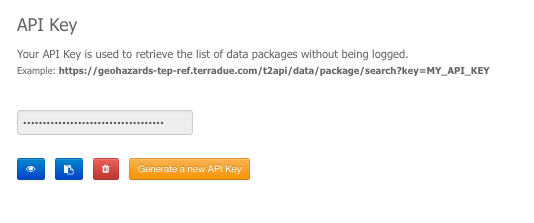
You can get a private API key associated to your account. Currently this key can be used only to get access to your data packages without being logged in on the portal: e.g: https://geohazards-tep.eo.esa.int/t2api/data/package/search?key=MY_API_KEY
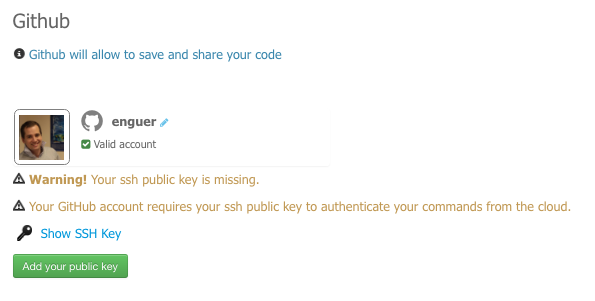
Linking your Github account to your profile will allow you to use Github as your Software repository for your developments on a Cloud resource of the Platform, such as a Developer Cloud Sandbox virtual machine. You can also release and share your code on GitHub.
..note:: Link your github account is not mandatory but highly recommanded.
To link your Github account:
 .
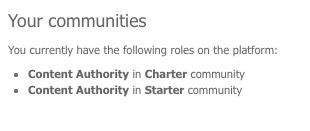
.To find out which communities you belong to, just go to the Communities tab on your profile page. The communities for which you are a member are listed here, along with your role in it.
To find out how you are using the platform, just go to the Usage tab on your profile page. You will see what is your level for each type of usage of the platform.
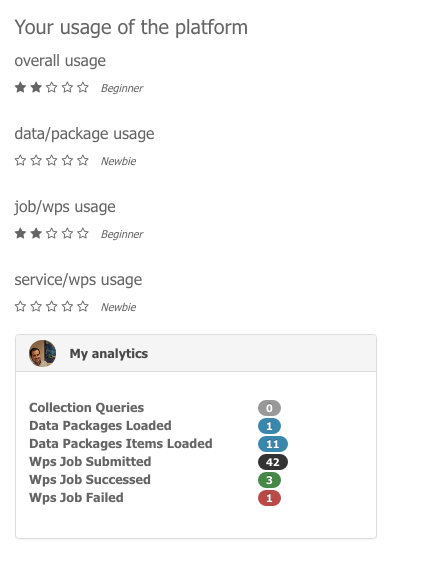
To find out more precisely the number of data packages you loaded, the number of jobs you created, how many failed or were successful, ... Just go the Analytics page from the portal homepage. You will see:
Requirement coverage
GEP-TS-ICD-010
This section shows that the platform has an analytics web widget.
The accounting panel on your profile gives your current credit balance, as well as the list of all transactions associated to your account:
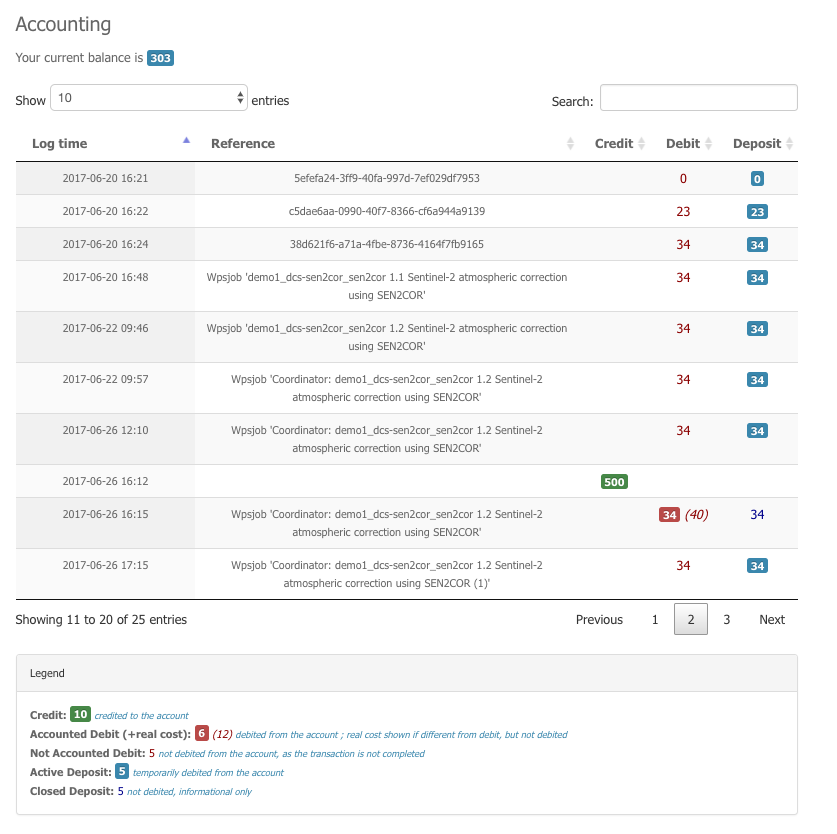
A deposit transaction is stored when the user execute a job process using as balance the quotation returned first by the processing service for the selected parameters (it implies that the wps provider implemented the quotation mode). Deposit transactions can be active or closed. An active deposit is accounted when calculating your account balance (covering the possible debit transactions associated to the same process). A closed deposit is not accounted when calculating your account balance (but does not cover anymore the possible debit transactions associated to the same process). A deposit is automatically set from active to closed when the job process is failed or when the job is succeeded with at least one transaction recorded from the wps provider.
The current policy for a wps job process accounting is that the total amount debited to the user corresponds to the real usage of the wps process and cannot be greather than the estimated deposit.