STEMP
In the context of the VOLcanoes Thermal Application for GEP (VOLTAGE) pilot INGV has setup an end-to-end processing chain (named STEMP) for the generation of surface temperature maps over volcanic areas. It generates surface temperature map in file format fitting the Researcher and Users needs from new EO missions data such as Landsat-8, Sentinel-2 and Sentinel-3.
Output specifications
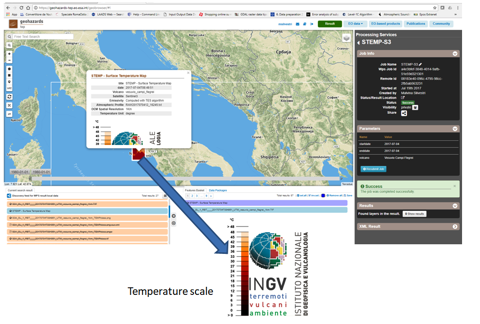
- surface temperature map (STEMP-S3 and STEMP-L8)
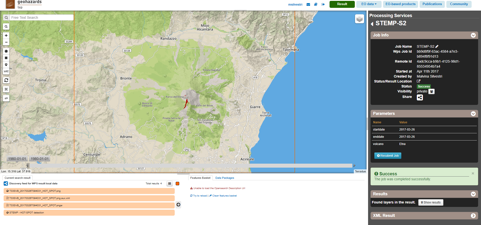
- hot spot map (STEMP-S2)
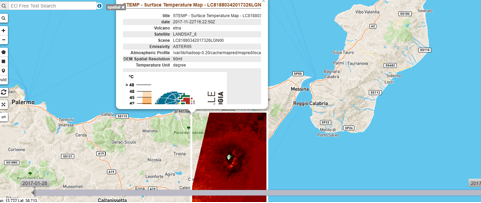
The Surface Temperature Map Process (STEMP) tool aims to produce surface temperature maps using optical satellite data having thermal bands (Landsat 8, Sentinel 3). STEMP is also able to produce an hot spot detection map only during eruption using Sentinel 2 data.
STEMP produces a GeoTIFF file as output. It contains the surface temperature maps (or the hot spot pixel for Sentinel 2). The output name of this product is the same of the input file with the “_TEMP.tif” final code. The processing, running in automatic, can be executed also in manual mode.
Three different tools are installed on Geohazards TEP platform:
- STEMP-L8 for Landsat 8
- STEMP-S2 for Sentinel 2
- STEMP-S3 for Sentinel 3
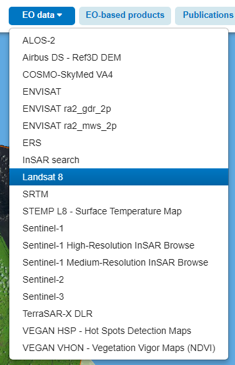
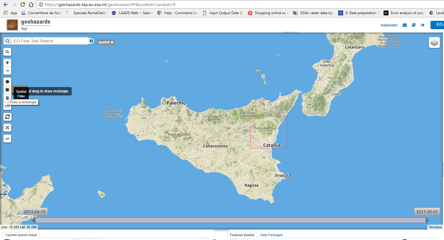
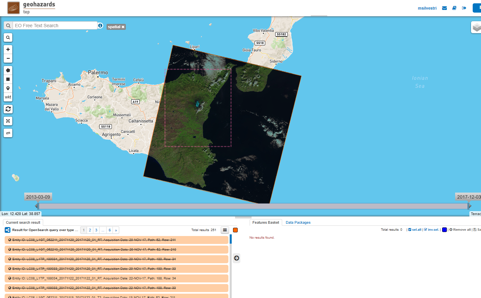
Select from “EO data” the file to process:
- Landsat 8 for STEMP-L8
- Sentinel-2 for STEMP-S2
- Sentinel-3 for STEMP-S3
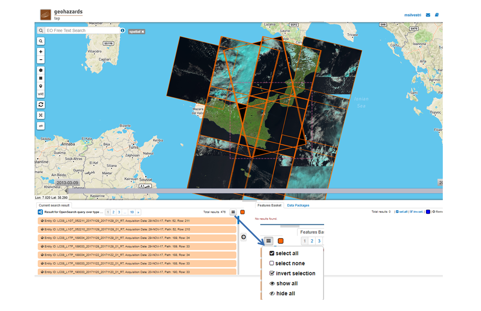
All EO input data are visualized, select “hide all” to hide all the data


Use the following input for testing service and verify results with the output :
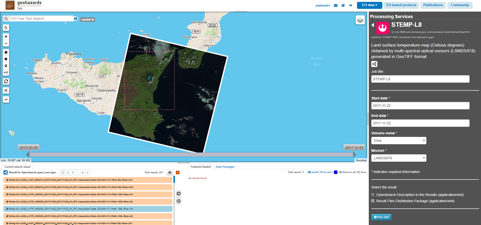
Select the STEMP-L8 service and use the following information:
- startDate: 2017-11-22
- endDate: 2017-11-22
- volcano: Etna
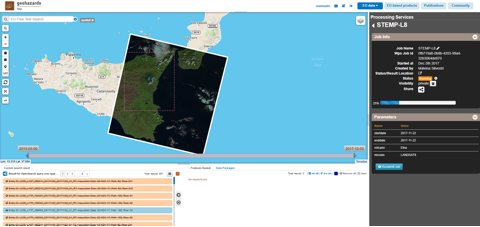
Expected result: LC08_L1TP_188034_20171122_20171122_01_RT_B10_TEMP-etna.tif
Select the STEMP-S2 service and use the following information:
- startDate: 2017-03-26
- endDate: 2017-03-26
- volcano: Etna
Expected result: T33SVB_20170326T094031_HOT_SPOT-etna.tif
Expected result: S3A_SL_1_RBT____20170126T091215_UTM_etna_1km_TEMPclass.tif